Blog in React
Sat, 11 Apr 2020New blog (in React, Next and Markdown)
Disclaimer 1:
I am a Padawan, it means I am learning. I have broken this blog many times before publishing it. If you are already familiar with React and / or Next, I understand that I will have many errors but I am of the opinion of: "Tira" (in spanish is someting like: Do it!), that later we analyze how to improve, but I do not like to remain immobilized.
So I will have many mistakes, but I think I add value by publishing my experience.
Disclaimer 2:
I don't usually write in English. This is another great challenge to get out of my comfort zone.
So I will have grammatical errors and I apologize if it is not perfect. It is something that I want to practice in my day to day, and I was excited to have a blog in English, so I considered this project as the perfect point to start.
Before starting, all the code for this blog is in GitHub.
I understand that they will ask themselves: What do you do? Being a fan of WordPress so you start creating a blog that obviously It will have a learning curve, and challenges in his implementation.
Well, that's why, to get out of my comfort zone. I already have an "SEO agency" blog, I have a podcast, but I pigeonholed them into specific themes.
This blog has been broken, more times than I can count on my hands. But it went ahead.
Since I had a programming bootcamp, and right after finishing, The apocalypse came with the Coronavirus (Covid-19), because what better than to practice in my spare time?
It is not for nothing, but a whole mastery of the organization of time taking into account, having to work with a son of almost 3 years at home, without a nursery, or grandparents who can help us.
It was a super interesting challenge. The truth that React is an impressive technology. At the bootcamp we couldn't see Next or Gatsby so I was reading their documentation and I think it fits perfectly with what I need.
I explain why.
What technologies I was looking for and why?
I was looking for the speed and immediacy of static content.
I'm a big fan of Simplenote a very simple app for creating notes created in React by Automattic.
In it I have become used to creating notes using markdown. First, for its simplicity, and later, for the ease of use on any other platform.
So I decided to look for examples that would serve as a basis and inspiration. Of all the content (the vast majority in English) the most important approaches were:
- "Building a static blog site with Markdown and Next.js" by Eduardo Pineda
- "Build a markdown blog with NextJS" from Telmo Goncalves
- "How to create a static blog with Next.js and Markdown" (in spanish) by Rafa Moral
I tried all these approaches, but after trying each one, I was left with the basis that Loren Stewart proposes that you can detail the code in their GitHub Next JS Blog kit and all the details of this "starter theme" on the web React Template.
It is ideal because is design to cloning the code, and it has a very clean base, with several features that I want:
- Reading progress bar
- Simple and minimalist side menu
- Be able to quickly create posts with the terminal
- Metadata and being able to implement SEO aspects as metadata in a simple way
- I was looking to have the best scores in lighthouse, GT Metrix, and other performance measurement tools.
So let's go through the installation step by step.
Let's do it.
Creating my blog in Next JS, React and Markdown
Prerequisites:
Clone the project:
git clone https://github.com/lorenseanstewart/nextjs-mdx-blog-kit <Your project name>
Initialize development environment
For this, the first thing, we make our:
npm install
To install all dependencies in the project folder. Once finished we put in the terminal:
npm run dev
With this command the development environment is initialized in: 'http://localhost:3000/' and we see the changes that we are implementing in our browser, every time we save any of our files.
Personalization begins
You will see that the folder organization architecture is very intuitive. The first step is to go to the config folder and edit the config.yml file with your project data.
In it we define the author, the metadata, the menu, and the primary colors to use in the CSS. Many of the CSS variables are defined in this archive. For further modifications, I explain later.
Install CLI (Command Line Interface)
The blog, as it points out in its documentation, processes pages based on the metadata found and publishes them, extracting the information of the components.
You should make sure to use CLI to create all pages and new posts.
To install it, in the terminal, inside the project folder, we must do:
npm link
When installing CLI we can use the keyword: blog to create our posts. Following the following format:
blog -t page -f miWeb // This command creates a new page titled: "miWeb.js"
blog -t post -f blog-react -m // With this command a new post is created called: "blog-react"
Why do I use a -m after the post title? Because if we do not identify the file type, by default it will be a JavaScript file.
With the -m I am specifying that it is markdown and it already automatically incorporates the header with the following metadata:
import BlogMeta from "../../components/BlogMeta";

export const meta = {
    title: ["Blog in React"],
    tags: ["react", "next"],
    layout: "post",
    publishDate: "2020-04-11",
    modifiedDate: false, // "You must use the American format for the dates: 'YYYY-MM-DD"
    seoDescription: ["Learn how to do a blog with React and Next to serve static content"],
    exclude: false,
    hideProgressBar: false,
}

<BlogMeta data={props} />
And this is the only thing you need to have your post ready. He automatically creates the URL using the file name, and as you can see, in the meta section we control whether we want to exclude it (or include it) in the blog listing.
You control the date, the tags, the title, the meta description. This with a large asterisk since I have certain complications with the SEO part (quite an irony). I'll tell you later.
Below we simply write our post.
In the official documentation you have more examples that we can use with the blog command, but I wanted to reflect what I think is more basic: create a post, and create a page.
NOTE: Punctually I had failures and the test post is not appear in the list. In the documentation they point to do: 'npm run clean'. Also, occasional failures, as in almost everything in life, with stopping the development environment (Ctrl +,) and starting again: 'npm run dev' was enough.
CSS
As we saw at the beginning in the file 'config.yml' we define general CSS variables as the theme colors.
But if we want to modify the rest of the styles, we must go to the styles folder and modify the file: 'index.js'.
For example, I changed the font that came by default for headings and text.
To do this, I downloaded the font from Google Fonts and converted it to the format: .woff2 to ensure the smallest possible font size: Vollkorn and Open Sans. You save them in the folder: '/public/static/fonts/'.
Then in the CSS you just have to call it regularly with: @font-face.
Then in the style's index.js, we can modify the CSS. Remember this is a JavaScript file, that means all CSS it is encapsulated within the constant: globalStyles = css.global.
Do not forget that we can use variables from the config file to bring for example the colors: '$ {config.css.accentColor};'
Pages and components
The difference between posts and pages is that the pages are stored in the 'pages/' folder. The posts in the directory: 'pages/blog/'.
We should also not put React components in the pages directory, since Next.JS creates a path for each of these components, waiting for them to be a whole page. If we only have one component, we must save it in 'pages/components/'
Let's remember: The post files are markdown, and all thanks MDX, like the home page that you can find at: 'index.mdx' in the pages folder.
Furthermore, the pages are (complete) components of React. The default template has a test one titled: 'About' that I removed from this blog.
Let's use the code from this example template, but put it in image using the Visual Studio extension: Polacode I think it's cool ;-)
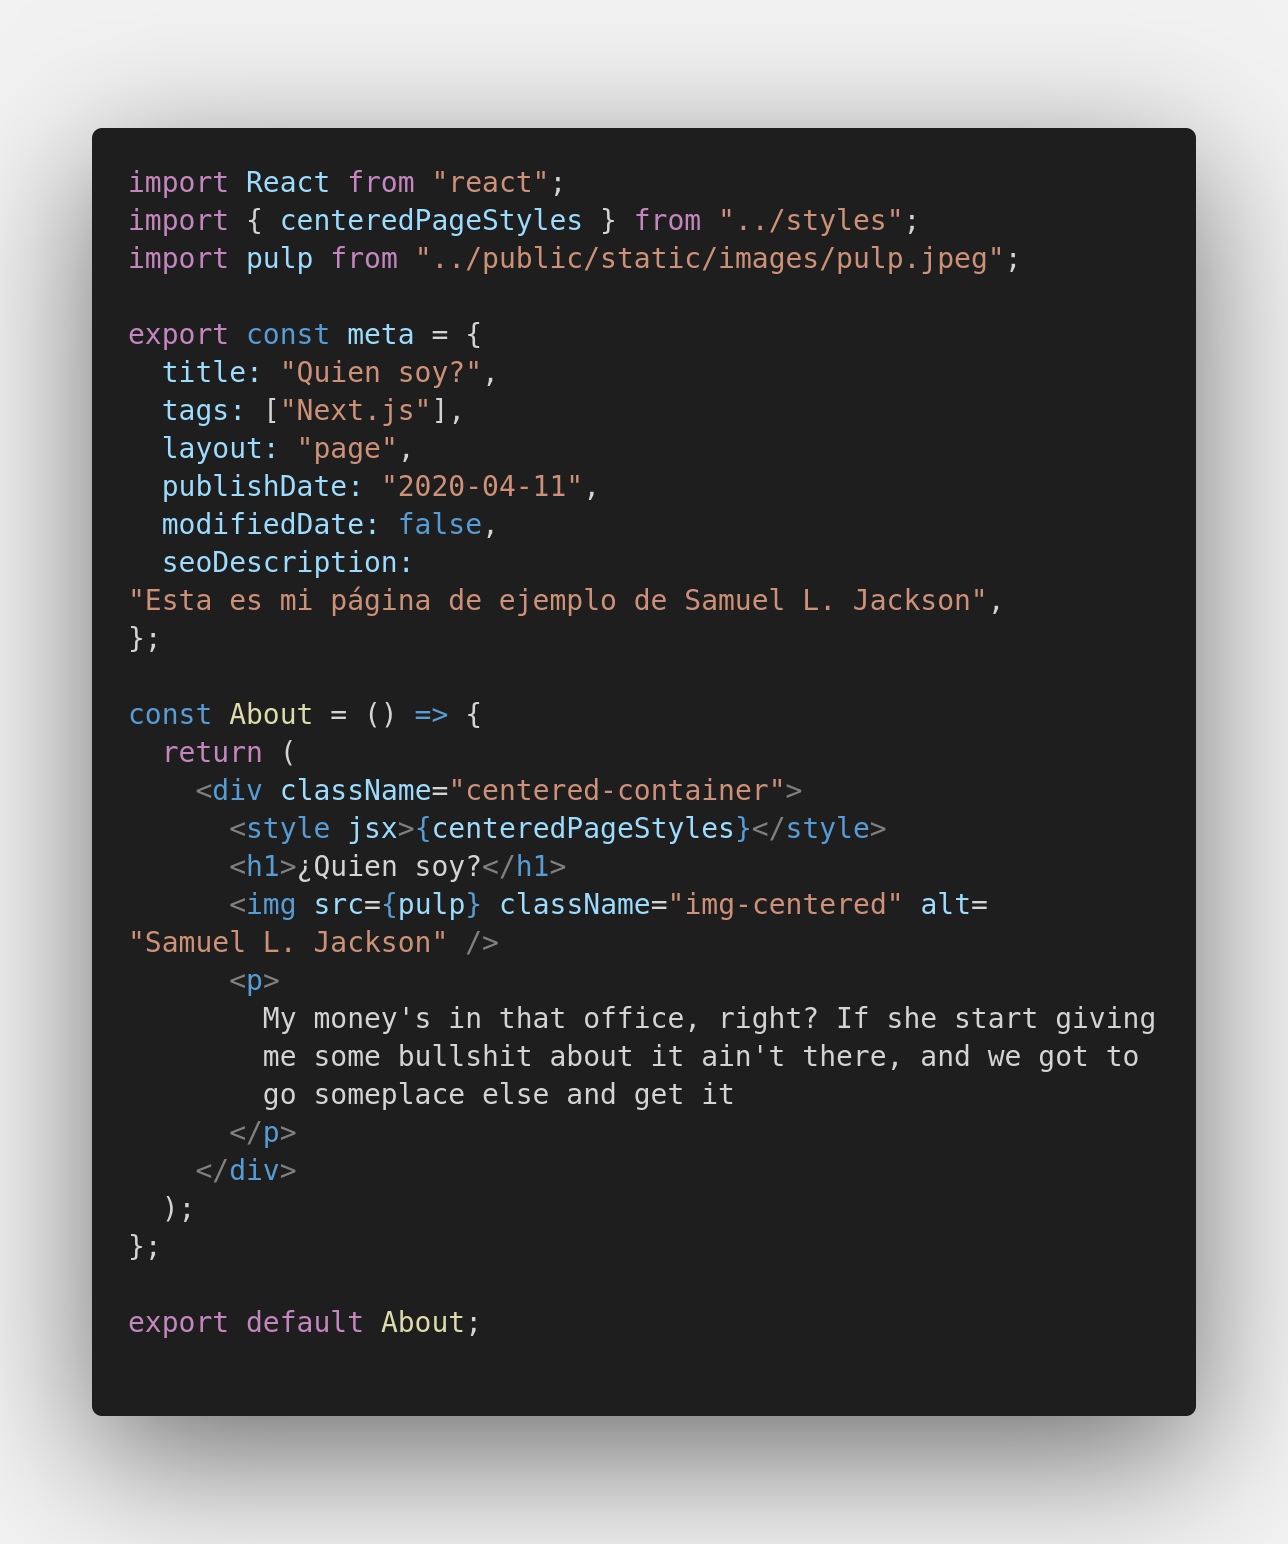
Like any React component we can "layout" our content using JSX.
We update it with the 'arrow functions', and we can "layout" our component. We just have to add it to the config.yml where we define its path for the menu.
In my case, I wanted to leave it simple. Same for practice (later) I will create more sections.
SEO
The part I thought would be easier on the blog became a headache. Everything seems easier in the documentation, but I had a lot of problems because the metadata was not being sent correctly, as I explained at the beginning, when 'export const meta' is automatically created with all the data.
SEO in this starter template is managed with an NPM package: Next SEO. Which is wonderful. Greatly simplifies SEO management in projects with Next.js
It already comes in the template dependencies, or you can install it:
npm i next-seo
As you can see in its documentation, it is very simple, we only have to do the import in the post or page that we want to use:
import React from 'react';
import { NextSeo } from 'next-seo';

export default () => (
  <>
    <NextSeo
      title="Simple Usage Example"
      description="A short description goes here."
      canonical="https://www.canonical.ie/"
    />
    <p>Simple Usage</p>
  </>
);
And within the NextSEO component we define the metadata and we can add Open Graph data, we can define that a page is not indexed, we can add structured data, etc.
It's great. According to the template documentation, the metadata is passed just by modifying the data when creating the posts, but I was not able to send it correctly. So I had to use the direct method of the next-seo module, as I am explaining to you.
If in the future, I manage to resolve this point, I will do the update in the post.
There are more aspects that I want to develop in this regard, for example:
- The robots.txt file
- The sitemap.xml
But they are aspects that with practice I will be implementing, first in this blog, and later in the other parallel projects that I want to develop in these technologies.
Website optimization
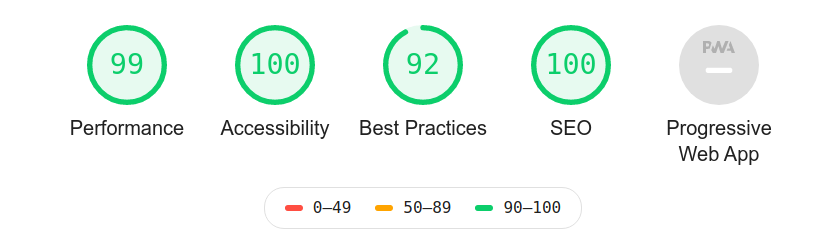
The theme does what it promises. It’s just amazing. Check out the valuation at lighthouse:
And the evaluation in GTMetrix:
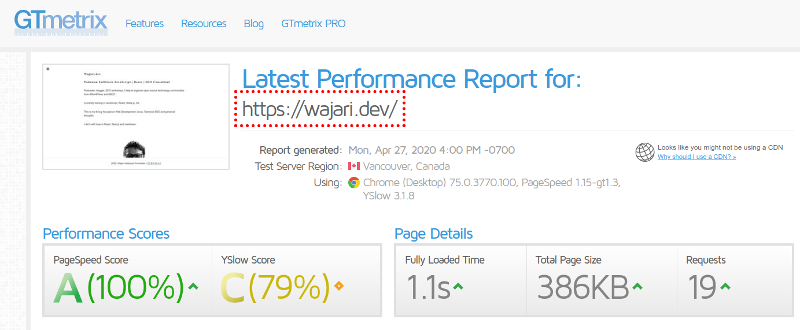
I have never had such positive evaluations. It is the most positive aspect of this technology. However, this is only the beginning. I want to use this blog as "testing" (since I don't mind breaking it too much).
Implement and be able to experience everything I'm learning both in React, like this fantastic Next.Js framework.
Final thoughts
Well this is how we started. Creating and breaking to learn in this fantastic world of JavaScript programming.
Long life and prosperity!
See you in future reactive posts.